Games Art and Design

Thursday, 5 May 2016
Self Evaluation
Throughout the course of this unit I feel as though I have developed my skills really well, going from someone with little to know knowledge on 3D software or the different processes to someone who is confident in their ability to create a variety of objects and get them ready for use as game assets.
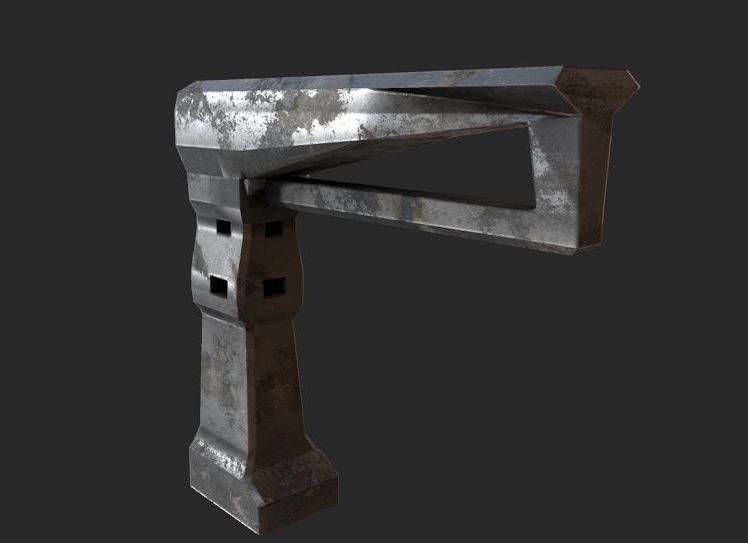
The work that I have produced may have started out as reflective of my ‘beginner’ status in the 3D world, but I feel like I have progressed to a point where I could call myself an intermediate, looking at the final two projects that I have submitted, both of which are readied game assets. The pillar looks as though it could have come from an early horror game on the ps2 or the xbox, while my time machine is embedded into a map that I made, and it is animated, which I previously didn’t know how to do.
I think the easiest part of this unit has been the modelling section, as although I made mistakes at the beginning, that was to be expected, and as time has gone on I’ve got more confident in my ability to create recognisable objects, improving my workflow and the processes that I use to create objects, keeping in mind how the item would be built in the real world so that I can split the model up into those segments and using floating geometry wherever necessary in order to create the illusion of reality in my models.
What I found to be the hardest part of this unit is probably baking. At first, I didn’t understand UV mapping, but I’ve got at least a basic grasp on that, however, it is the caging of the high poly model which I found - especially with my pillar model which was comprised of organic shapes - to be something actually pretty frustrating, because it has to be done just right, otherwise the cage won’t work and it becomes a repeating back and forth process where you’re constantly retrying to get the cage done right.
I’ve really enjoyed the 3D portion of this year, as I feel like I’ve really learned something new, and been pushed to investigate all the different areas of this part of the subject.
Having finished the model that I’ d be submitting, I decided that I would continue on, and try to create the version that I imagined at the start of the project, hoping to teach myself a little bit more about mapping and about UE4.


I managed to get the centrifuge pieces to spin in UE4 using blueprints, and the lighting effects come from attaching ‘sparks’ to the ends of the model and increasing their size so that when they spin the create a spinning circle of energy.
This is the final render of my time machine. I’m pretty happy with the way that it turned out, and I’ve begun to enjoy the process of making game assets and having them appear in UE4, able to move and be interacted with.
I think that if I were able to do the project again, now that I’m more aware of the constraints that we were put under, I would do something smaller so that while my model would be smaller, it would also have much more detail on it.


Really enjoying this artist’s work as a mixture of both 2D and 3D work using matte painting to get the look of PBRs. Art done by Lars Sowig.
Coming into the final week now, I’m happy with where I’m at in terms of my model and what I can do using 3D software, and I’m looking forward to implementing that into my 2D work and getting back into painting.


Once all of the models had been texture, I put them into UE4, plugging all of the texture maps that I’d made into the UE material editor and attaching each material to its corresponding model.
A couple of times i went back and forth between UE4 and Quixel, editing
the maps that I’d made if the look I got wasn’t quite what I was hoping for.
With just a 10k triangles limit, I had to cut out a large part of the generator (and surrounding environment), leaving me with just the core of the time machine as the model.


I like the fact that my model seems so large because that’s the effect that I was going for when presented with the task, instead of creating something small enough that you’d be able to step inside it.


Phenomenology
One of the games that I have found makes you extremely aware of your body, is Alien: Isolation. I think that this effect is fairly typical of the horror genre, but especially so within this game.
As the ‘action’ as it were gets more intense and you get more and more adrenalin going through your body, your breathing gets harder and faster. This is a huge problem in this stealth horror-survival game as there is a setting in which you can turn on your microphone, allowing the AI humans and Aliens to hear you if you make too much noise. While this mechanic isn’t intrinsic into the game, if you are playing with a gaming headset on and the setting turned on, then the experience of being onboard a collapsing space station, being quite literally stalked through the run-down areas by an Alien that is stronger, faster and has an acute sense of hearing becomes all the more terrifying.
I think when games passively make you aware of yourself, they immerse you into the gameworld so much more than if you were to interact with the game via touchscreen or through a camera system like the kinect, especially when that game is set in the first person, making you believe that the character’s emotive state is your own as you get drawn into the terror of being chased by something that you can hear crawling around the map above you, while also being able to hear you if you move too quickly, or if you are foolish enough to knock something in the environment over.
I used the pillar as a sort of a test run for all of the other parts to my model, following the same basic process of UV map, Highpoly model, Cage followed by baking the normal and ambient occlusion maps before texturing the model inside Quixel, using the smart materials to quickly generate the type of material that I want to use and then going through the different maps and editing them so that the material looks how I want it to.


A quick before and After putting the low poly model into UE4 and applying the material to it.
It’s a fairly simple method of texturing, but the I quite like the results, although I think that there might be too much ‘wear and tear’ on the material as it stands at the moment, so I’ll have to go back and edit that.


Having UV mapped and Baked this part of the model, I used quixel to quickly generate a metallic material that would look like something you could find in the service tunnels of a high-tech facility. I wanted to include bits of wear on the material so that it would look as though the metal had reacted to the high amounts of energy coming off of the generator and the portal.

Next came UV mapping, I started out by doing an automatic projection to get the faces into recognisable groups, before doing a planar project on faces that had the same direction to get good UV islands.
Once that was done I needed to make a highpoly version of my mesh so that I could bake and texture it.


Lip Comarella’s work is full of colour which I really enjoy. I like his creature designs as the earthly creatures he uses become something completely alien - reminiscent of Avatar.
Only a couple more weeks left. I’ve got to grips with UV mapping in the last project, so we’ll see how it goes with this one since I know the direction I’m headed!


I put each piece on a separate layer so that I would be able to easily navigate through my scene. Most of the parts to my time machine started off as cylinders, with the exception of the pillar - I used a duplicate special to get the correct number so that I would only need to make 1 pillar instead of 12.
Each object also had a separate material in maya so that I could keep track of what type of maps I would need for each part.


I started off my model with a simple cylinder, extruding it down and then back up again until I had the shape that I wanted, which was something along the lines of how an fusion reactor looks on the inside.
I kept extruding until I had something that resembled a structure that would be connected to a base somewhere - most likely underground and then I started making the other components using the same method.


The black material was an error that I encountered early on. I tried troubleshooting my problem on the internet, and tried changing material and editing the properties, but I wasn’t able to fix it until I copied the mesh across to a different runtime of Maya.
Time management
5 weeks for completion guideline
Week 1-2: Design and Modelling
Week 3: Retopologize and Bake
Week 4: Texturing
Week 5: Insurance week
Since I’m going away for 2 weeks during easter, and I doubt I’ll be able to get any work done while I’m at home due to me not having anything run maya on, I’ll need to get my modelling done sooner, or do it in stages so that I’ve got parts of it completed and other parts of it in the works.
Week 1: Modelling
Week 2-3: Easter Holidays
Week 4: Finish modelling / high poly and bake
Week 5: Texture and put into UE4
I’m fairly confident with how I’ve planned out my time because I’ve feel like I know what I’m doing, and having completed the Damaged Pillar task, I have a fairly good grasp on what needs to be done and how long it takes to complete each part.
For the final project, the Time Machine, I had a few ideas, each of them ranging in size. Some of the ideas I had were watch-sized, gun-sized, human-sized and bigger.
One of the ideas that i really liked was reminiscent of the ark from Halo 3 when the structure rises out of the ground. Something that was on an epic scale that would say ‘look’, we’re gonna rip a hole in time and space and throw you through it. From there my idea evolved and became steadily more feasible as I added more components to the model. This is just a little moodboard to help drive my ideas a bit further.


Really like this Artist’s work, I like the narratives that his paintings have, as well as his use of colour and composition to drive that narrative.
Finally managed to get my bake my Normal maps having had a week’s worth of trouble trying to retop and cage my mesh, now I'm on to putting it into UE4 and giving it some textures, though I’m not going to use a software to retop my mesh in the future since it was more hassle than it’s worth.


Subscribe to:
Comments (Atom)